Guide: Building a tiki bar from pallets & bamboo
Create an outdoor bar area in a weekend!
Approximate assembly time 30 minutes. 2 man assembly.
The perfect project for a summer staycation. This simple design requires the following products and tools:
| Materials | Purpose |
|---|---|
| 3x Standard size pallets | > Bar framework & base structure |
| 2x Moso Bamboo Roll Screen (H: 1m x W: 2m) | > Bar cladding |
| 1x Mystic Forest Bamboo Wallpaper (H: 1.25m x W: 1m) | > Bar top decoration |
| 1x Pack of clear Heavy Duty Cable Ties (20-30cm long) | > Temporary attachment of screens. (Use screws if the bar will be permanent) |
| 1x Box of 1 Thread General Purpose Wood Screws (80mm or 100mm in length PZ #2 Cross-head) | > Screwing the pallets together to form the bar framework |
| 1x Box of Decking Screws | > For making the tiki bar a permanent structure (use cable ties if not) |
Tools
- Drill + PZ #2 drill bit.
- Gloves (to avoid splinters).
- Metal square (optional)
- 2 pairs of hands!
We also included a few extras in our set-up as a backdrop to the bar. The Bamboo Bone Screens made from vertical slices of Indonesian bamboo can be used to clad an existing fence. And they can also be fitted inside a summer house or perimeter of a pergola for a more contemporary look. The bar can be built as a temporary structure or a more permanent fixture. Read on to find out how.
Step 1
Creating the frame
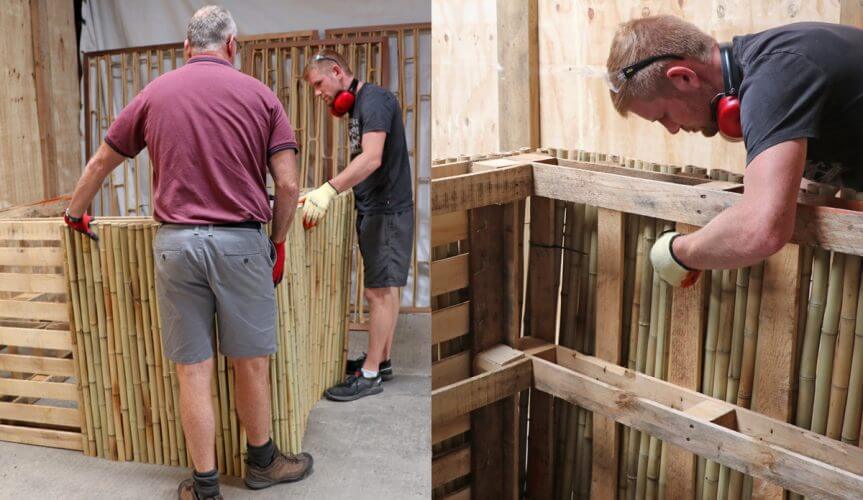
Stand two of the pallets on their long sides. Bring together to form a right angle (use a metal square if you wish). Attach screws between both pallets at the top and bottom corners. Tip: Check each particular pallet design and secure screws into the two thickest parts on either pallet, at least at the top and bottom. You can screw straight or at angle.
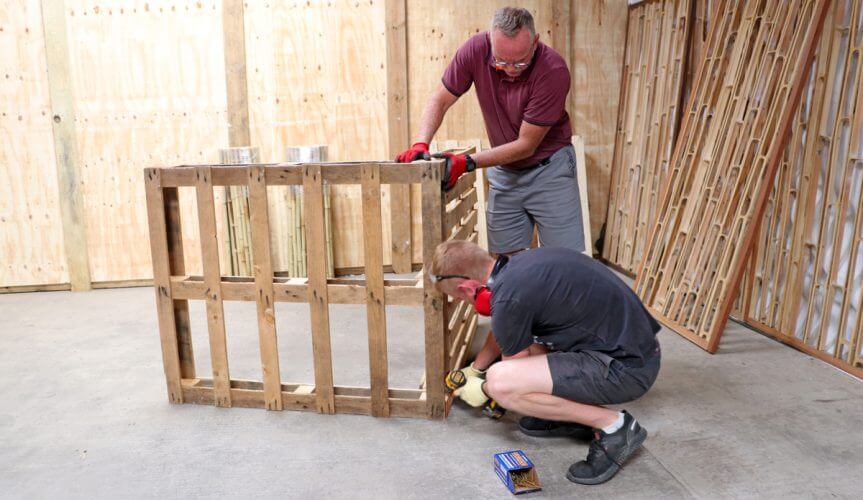
Use two pallets screwed together at a right angle to form the front and one side of the bar.
Step 2
Securing the frame
Lay the third pallet on its long side. Bring the pallet to form the second corner. Check that this forms a right angle. Then attach screws between both pallets at the top and bottom corners.
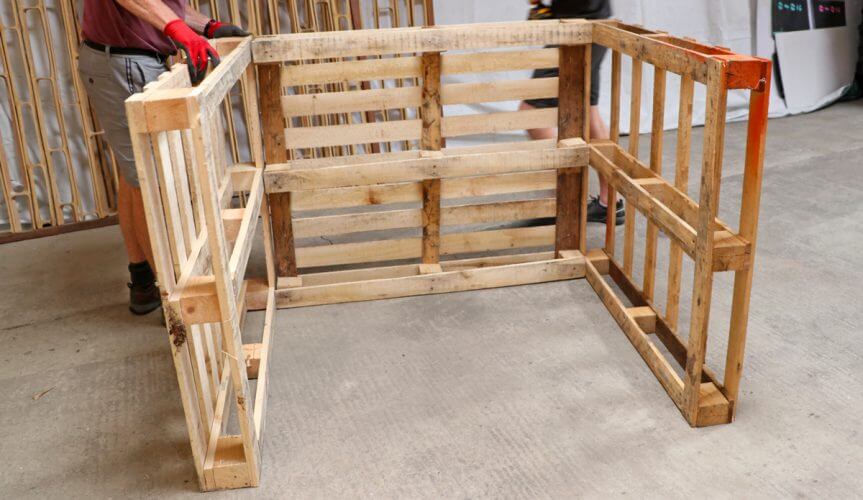
Bring the second pallet into place and secure. The three pallets will form the front and sides of the bar.
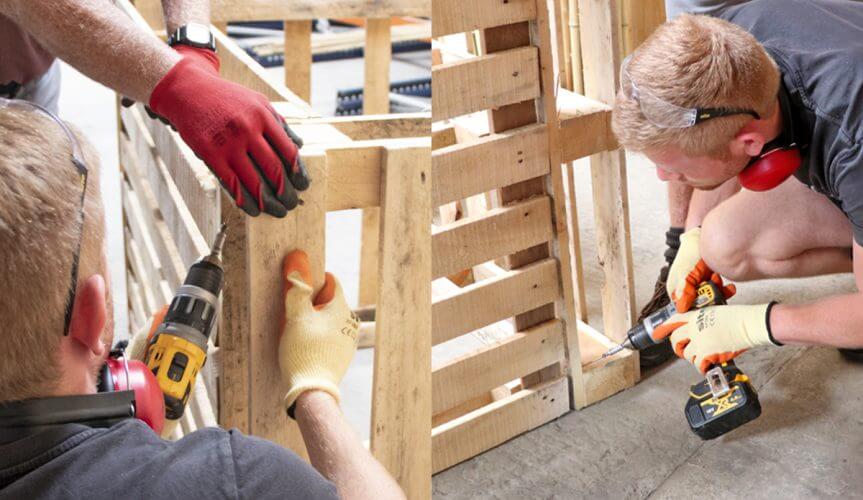
Screw the pallets together – join top, middle and bottom.
Step 3
Attach the bamboo screens
Unroll the first 1m tall bamboo screen, starting from the centre of the front pallet. If attaching with screws: check where the main supports are running vertically on the front pallet and right hand side pallet. Pre-drill holes in the bamboo poles nearest to these verticals, top, middle and bottom. Then attach the fencing onto the pallet frame with decking screws. Repeat for the centre left, so that the pallets are completely clad in bamboo fencing. If attaching with cable ties then attach around the main verticals.
Step 4
Install the bar top
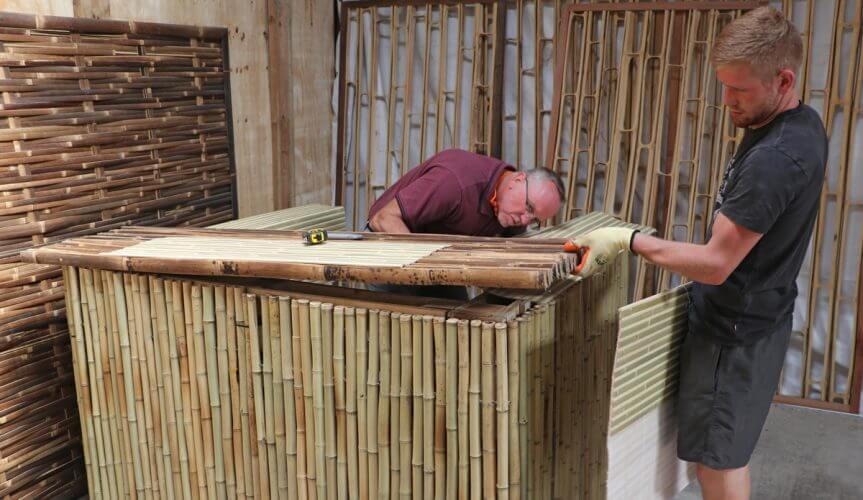
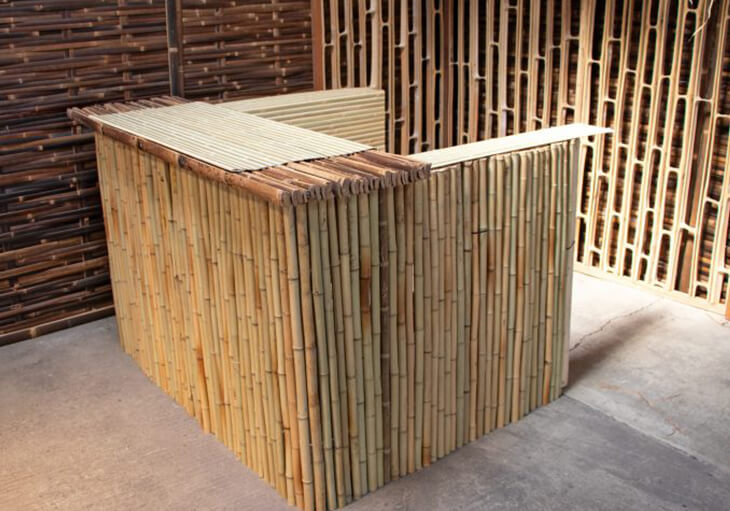
Add a wooden or bamboo worktop to form the bar counter.
Install a worktop to form the main bar surface at the front. We used a spare solid fence panel from slats of Java Black bamboo to balance on top for the base and on top of this laid Mystic Forest Bamboo wallpaper. Again, this is ideal for dismantling over the autumn/winter period. Alternatively, you can fix a solid worktop by screwing from beneath.
Step 5
Add the finishing touches
Attach something to the tops of the sides of the pallets to finish. We just used more Mystic Forest bamboo wallpaper, as this curves around the edges and makes the inside look more attractive when facing the bar from the outside.
Customer tiki bars
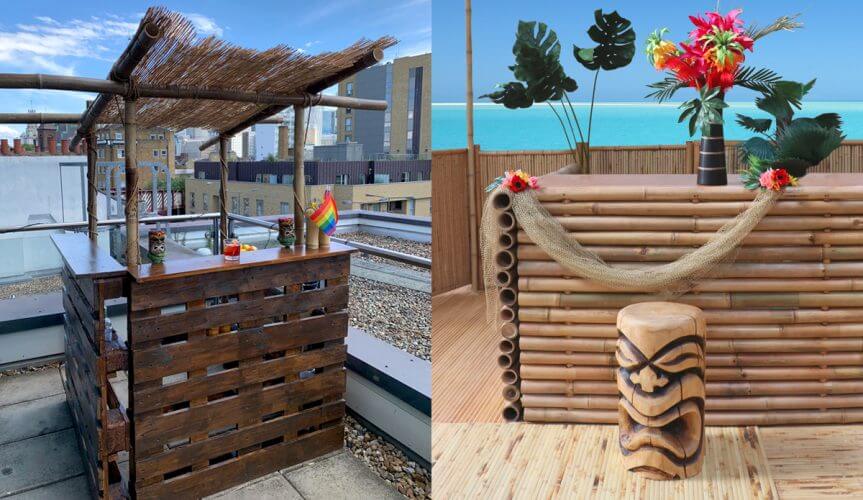
Below left is a Tiki Bar recently created by a customer from pallets. They used our bamboo thatch for the roof and bamboo poles for supports. Also featured, another Tiki Bar project using Tali Whole Pole Panels.
Inspired to create your own outside entertainment area? Visit our bamboo fencing for more options>>